Blog Archives
Week 3 of right-brain project
Week 3 of my creation journal.
Keeping things versatile is keeping me strong. I like having such a broad range of creative activities I can count towards this project.
Day 1:
Spent the morning taking photos. Spent the afternoon editing them and a backlog of several more photo shoots as well that I was able to finish up.
Day 2: I admit, I missed a day. I’ll make it up before the week is up though 🙂
Day 3: drew something. It sucked. Guess I wasn’t feeling it.
Day 4: mini photo session
Day 5: fun with facepaint. Practicing a sugar skull for my friend who wants to dress up on Halloween. We did a run through just for kicks.
Day 6: editing photos
Day 7: saw an image on a YouTube video (proof: the photographers on photography) and decided to paint it.
Creation journal week 2
I’ve unofficially challenged myself to do one creative thing each day. The criteria is quite vague allowing the project to be versatile and encourage all forms of creativity. Last week was inundated with editing photos from a photography session last week. I did manage to sneak in a batch of cookies, paint a rock, draw and paint a card for my aunt, and take a few more photos for a friend of mine.
So here goes week 2!
Day 1:
Day 2:
Days 3 & 4: shared my joy of painting rocks with the kids:
Day 5:
Finally painted one myself:
Day 6: back to cards. For one of my favourite little girls!
Daily dose of right-brain
I have to admit I get a fair amount of inspiration from Pinterest. I follow Amanda from Wit & Whistle for her sketches and typography. I recently stumbled upon the following quote:
Draw something every day, even if it sucks.
I find myself curled up on the couch at the end of each crazy day, and these words repeat in my head. I can no longer idly watch a show without a pen and sketchbook in hand.
Or perhaps a rock and a sharpie marker.
Or maybe I won’t even let myself sit down until I’ve set the lights up in my makeshift studio (aka the living room) and taken a few photos.
I’m craving it like mad lately! I don’t know if I’m trying to balance the left brain or if I’m just scratching an itch, but I feel like there’s so much creativity in there that is wanting to pour out. I feel like I haven’t had a complete day if I haven’t created something.
So I’ve challenged myself to exactly that. Create something every day. Even if it sucks.
Thanks Amanda for the inspiration. http://witandwhistle.com/
iPhoneography 2: Pixlromatic
I only discovered Pixlromatic this week, and I already love it. This app pretty much speaks for itself. It’s user-friendly and has lots of fun options. The free app includes plenty of options to have some fun. The “plus” option is only $1.99 more. I haven’t quite figured out what “extras” I got from upgrading to the plus yet… So stick to the free one until you know if you like it.
Here’s a demo of what you can do with your photo in Pixlromatic:
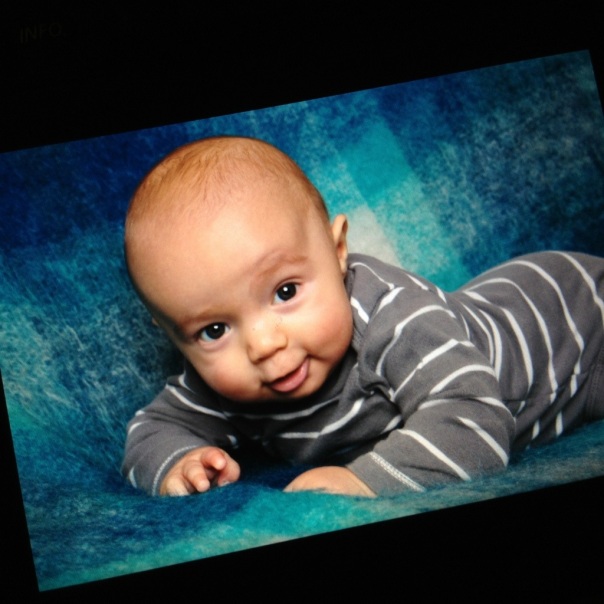
I took a super cute photo of a super cute baby for this demonstration.
Don’t worry, that’s not road rash. Baby X had just finished eating blueberries for lunch.
This edit was super easy.
Step 1: Choose your “film”. I simply choose a film style called “Hagrid.”
Step 2: choose an effect. I didn’t use one here, but this option allows you to add some really funky stuff like flares, bokah, vignettes and all sorts of neat “light” tricks. Didn’t suit the style I was going for here, but have found it fun to use on all sorts of other photos.
Step 3: pick your frame. This option not only puts a border around your photo, but some of the frames include an overlay effect. The one used in this photo was called “dirt.” It helped exaggerate the whole theme of the photo.
Step 4: save.
Yep, it was that easy. Can you see how this becomes addictive?
The following series of photos also uses Pixlromatic, but combines with Instagram and Bokehful.
 The first photo is unedited, this is the starting point.
The second photo is edited with PicFrame (see link for PicFrame how-to) & Pixlromatic.
I made the photo 1:1 ratio with PicFrame, then uploaded it to Pixlromatic. I used the “Antonio” film.
The third photo shows the frame “clean” by Pixlromatic added. Then the photo was edited in Instagram. I think I used the lo-fi setting.
Fourth photo: now this effect is really cool too. The app is called “Bokehful.” I discovered it after reading a blog called “iphoneography.com” Thought I would try it out, and I loved the effect.
Well, that’s it for now. Please feel free to ask my questions, or recommend new apps to me.
I have a lot more apps that I like to play around with. I will try to touch on the following apps in future posts: Hipstamatic, Photosynth, and Camerabag.
iPhoneography 1: PicFrame
iPhoneography, it’s an actual thing! A whole class of photography on it’s own. It makes sense though, right? An iPhone has it’s own series of advantages in the processing of photos. There are so many things that you can do with an iPhone that you couldn’t do with your DSLR or point-and-shoot digital. Not to mention the instant results.
For those of you who are just getting into things like Instagram, or posting your iPhone photos to Facebook, this is part one of an introduction to the things you can do with your iPhone camera.
This post is going to focus on an app called “PicFrame“, used in conjunction with Instagram.
1) step one: take a picture. Sounds simple right? I think most of us know how to do this step, but I am going to give a few pointers for the technologically impaired.
– Focus: when taking a portrait, or a close-up photo of something, give the camera a moment to focus on the subject. A quick tap on the screen will help your iPhone figure out what your focal point is. Otherwise, just hold your camera still for a second and let it automatically focus.
-Lighting: whenever possible, don’t use your flash. Get outside if you can, or near a window with some natural light shining in. At the very least, turn some lights on.
-Hold still: the steadier your hand, the better chance your camera has to capture your shot clearly.
2) Editing photo size: Apps like Instagram use square photos. You can bring your photo directly into Instagram and crop it there. You can also use apps like PicFrame ($1.99) to compose your photo before you bring it to Instagram or Facebook. PicFrame also allows you to add some design to your photo, or give it some flair:
– set up a square or rectangular ratio
– bring in multiple frames so that you can include more than one photo (like a collage)
– create borders around your photo.
– add labels (text) as an overlay
– add effects to your photo
You can really get a lot of editing done with this app. I’m going to give you a few pointers to start you off.
Step 1: Choose your ratio. If you are editing your photo for Instagram, use a 1:1 ratio. If you are using it for Facebook, you can use whatever you would like. Note that Facebook profile pics (as well as many avatars for different websites) are also 1:1 ratio, so any borders you make on a rectangular photo will be cropped off on two of the sides if you are using it for a “square” thumbnail.
Step 2: Pick your frame. The app includes about 72 different layouts in which you can put anywhere from 1-9 photos.
The example shown here is a 2 x 2 frame:
Step 3: Photo placement: tap one time on the square that you would like to put your photo into. You can choose from any of the saved photos on your iPhone. If you’ve taken photos with another camera, and uploaded them onto your iPhone, those will work too. Fill each of the frames in your layout.
Step 4: You can move your photos around in each frame. You can use two fingers and spread them to zoom in, or pinch to zoom out.
Step 5: By double-tapping the photo, an editing menu will open up. If you click on the Fx option, you will be able to scroll sideways through 21 different effects that you can add to your photo.
Step 6: On the main screen, click the top-right corner where it says “options.” A menu called “corner & shadow” will appear. Play around with these until you get the desired effect. This allows you to round corners or create shadows to make your photos stand out from the background. If you don’t want the frames around your photos, skip to step #7.
Step 7: click on the “style” button on the menu at the bottom of the screen. The top line reads “width” and by moving this right or left, you can make the frames around your photo wider or narrower. You can even make the frames disappear. You can colour the frames or choose a pattern for them if you like.
Step 8: Labels. Like in the photo shown above, you can add text to your photo. Type in your text, then click “style.” Here, you can choose an existing preset label, or you can format your own. If you are making your own, there are lots of fonts available from the main “label” window.
Explore a little with all the functions, you’ll get the hang of it.
Step 9: when you are done editing your photo, I recommend “sharing” it the following way. When you press “share” click on the option to “save” to your photo stream.
Reason #1: the app will not write that annoying “used such and such app to create this” on your photo. Some apps do that. I’m not sure whether this one does.
Reason #2: if you save to your photo stream, you can choose where you want to upload your photo to, you can save it to your computer, and most importantly, you can bring it into other apps to do further editing.
My next post will talk about another app for editing your photos called Pixlromatic.


